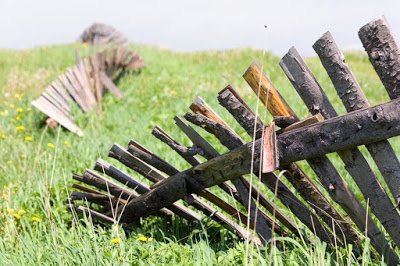
One of the biggest problems with wooden fences is that, unlike quality vinyl fencing, wood doesn’t always maintain its shape and strength over long periods. Over the years, the constant exposure to wind, water, heat, and freezing temperatures can cause your once-attractive fence to sag, bow, lean, or buckle. Fixing these problems isn’t exactly the work of a moment, but it is possible to rescue your leaning fence and give it a longer life.
Fixing Leaning Fence Posts
In most cases, fences will begin to learn at the posts. There are many things that can cause a fence to lean, including excessive moisture softening the ground, rot weakening the fence posts, and wind or ice putting too much strain on the panels. Regardless of the cause, you don’t want to ignore a leaning post – it will only get worse as time goes on.
To fix a leaning post, you’ll need to perform the following steps:
Dig Out The Old Post
You’ll need to dig a hole around the old post on both sides of the fence until you hit the bottom. Most posts are set at least two feet into the ground, though some might be deeper.
Break Up The Footing
Often, fence posts are set in a concrete footer that keeps them weighted down and in place. If your fencing has concrete footers, you’ll need to break it up with a sledgehammer and chisel or a jackhammer in order to free the post. Make sure you remove the concrete debris from the hole as well – it will only get in the way later.
At this point, you’ll need to determine exactly what the problem with the post is. In some cases, the post itself will still be in good condition, in which case you can skip step 4 below. However, if your fence post is rotten or broken you will need to replace it first.
Replace The Post
Use a claw hammer to remove the nails holding the fence panel to the post. Remember to brace the panels with some boards before removing the post – you can use 2x4s positioned at a 45-degree angle on both sides of the fence to keep it from falling over. Once you have the post free, replace it with a treated 4×4 post – never use untreated lumber.
Plumb The Fence Post
The next step will be making sure your post is straight and level. Use a carpenter’s level or square level to position the post correctly, and then nail some long 2×4 boards to the post at a 45-degree angle to brace it against the ground and keep it in place. Once the post is temporarily secure, pour a new concrete footer around the base and allow it to cure according to the instructions. This should be enough to secure the post and ensure it doesn’t move again.
Fill In Your Hole
The final step to resetting your post is to fill in the hole you dug. When this is complete, your fence should be as good as new.
In some circumstances, a fence can be badly damaged by leaning, or it might be too much work and effort to get it back in shape again. And sometimes, even after repairs, it can still look aged and ready to break down again soon. In these cases, you might be better off replacing your entire fencing with a new, stronger vinyl fence.
Besides the fact that they stay looking like new for decades, vinyl fences are also stronger than wooden ones and less likely to lean or buckle due to weather or shifting ground. Since the posts never rot, you’ll never need to replace them due to age or moisture. This makes them perfect for the homeowner that wants a dependable, long-lasting fence for his or her yard.
How We Can Help Homeowners In Dallas Texas
If you’re interested in replacing your current fence with a high-quality vinyl fence, contact us today at Future Outdoors®. We’ve installed hundreds of miles of tough, dependable vinyl fencing in and around the Dallas metropolitan area, and we’d love to make your fence our next project. Call us today at (972) 576-1600 or visit our Facebook page for more information and helpful advice.